My Blog List

Friday, September 29, 2023

2 July 1813 – Northern Spain – End of Talavera Campaign


Battles fought during campaign phase

Soult won four of the six battles fought

Wellington won the remaining two


Soult took and held the city of Talavera and therefore won the campaign


The campaign started on 23 July and ended on 28 September 2023

This was the first campaign using our new wargame rules, which rely on just 1D6 to decide firing, melee and morale.   The rules worked well and needed only minor adjustments.   Wellington had two British and one Spanish corps in each of his three armies.  The Spanish were allocated garrison duties, so most of the fighting was done by the British brigades.   The Spanish infantry performed much better than expected.   

Madrid Region

At the end of the campaign the French had occupied Talavera

Soult ordered his army to hold the city and established his headquarters there


Wellington ordered his army to hold just west 

Wednesday, September 27, 2023

1 July 1813 – North Spain – Day 7


Wellington retreats and abandons Talavera

French win campaign phase

No guerrilla activity


1st British army prepare to retreat

2nd British army retreat and abandon Talavera

3rd British army prepare to retreat


10th French army resupply at Villacastin

11th French army occupy Talavera

12th French army resupply at San Martin

Saturday, September 23, 2023

1 July 1813 – Battle of Talavera


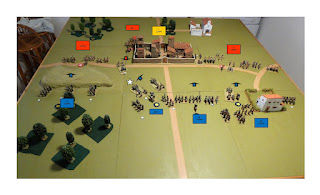
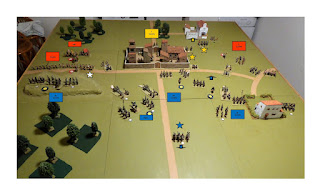
Tactical map of battle area

Talavera is the district administrative centre and the campaign objective

It is held by 2nd Anglo-Spanish army who have casualties to 10 of their 18 brigades

10th French army have orders to take the city, they have casualties to 5 if their 17 brigades


French – 11 infantry brigades, 3 cavalry brigade, 3 corps artillery

British –    8 infantry brigades, 2 cavalry brigade, 2 corps artillery

Spanish – 4 infantry brigades, 1 cavalry brigade, 1 corps artillery


Table at start of battle

General Hill has placed 8th Spanish corps in and around the city of Talavera

3rd British corps has been positioned to the right of the city

4th British corps is on the left, either side of the river Tagus

Hill has taken commend of half of 4th corps (between river and city)


Marshal Oudinot will arrive at the start of move 1 with his 11th French army

End of move 2

French arrive on table and advance towards city


Left – 4th British corps wait for French to advance

Left – British reserve artillery redeploy to fire across the river

Centre – Spanish cavalry deploy between city and 3rd corps

Right – 3rd British corps occupy farm and cavalry advance


Left – 33rd Italian corps advance on the left bank

Left – Oudinot takes command of Italian troops on the right bank

Centre – 32nd Westphalian corps advance through pass

Right – 31st French corps advance, cavalry move right to counter British dragoons

End of move 4

French attack town and farm


Left – British infantry between river and city withdraw out of artillery range

Centre – Spanish garrison receive casualties, but pass morale test

Right – British cavalry lose cavalry melee and retreat shaken with 20% casualties

Right - British garrison of farm lose 10% casualties and withdraw


Left – French artillery more effective than British, concentrate on supporting infantry

Centre – Westphalian infantry skirmish with city garrison and cause 10% casualties

Right – French cavalry lose melee and rout with 20% casualties

Right - French infantry skirmish with garrison of farm and cause 10% casualties

End of move 6

French attack on town continues

British abandon walled farm

3rd British corps redeploy


Left – British hold their ground

Centre – Spanish continue to hold all of Talavera

Right – British abandon farm and retreat to road


Left – Italians wait out of artillery range, waiting for their gunners to weaken enemy

Centre – Westphalian infantry and artillery continue to fire on city, but with no effect

Right – French infantry advance to the right of the abandoned farm

End of move 8

Time is running out, general French advance


Left - British hold their position and wait for French to attack

Centre – Spanish cavalry receive 10% casualties, fail morale and rout

Centre – Spanish garrison receive more casualties, but pass morale and hold

Right – British gunners seek cover in nearby square to avoid French lancers


Left – Italians advance both sides of the river

Centre – Westphalian infantry and artillery continue to fire on garrison

Right – French artillery hit Spanish lancers, who fail morale and rout

Right – Lancers charge gunners, who seek shelter in nearby square

Right – French infantry advance to attack British lines.

End of move 10

Fighting continues in Talavera

Wellington orders a general retreat


Left – 4th British corps on the left bank retreat

Left – 4th British corps on the right bank hold their position

Centre – Spanish abandon half of Talavera

Right – 3rd British corps retreat


Left – Italians take bridge and pursue retreating British on left bank

Left – Italians infantry brigade routed and attack on right bank abandoned

Centre – Westphalian infantry have taken half of Talavera and fighting continues

Right – French pursue retreating British infantry


Summary

The Spanish still hold half of Talavera, but have no reserves

Wellington holds the road between the city and the river

The remainder of his army is in retreat


Most of the French army is still operational, but are widely dispersed

They will have to regroup in order to take the remainder of the city

There only two Spanish militia brigades fighting to hold the city


With no reserves Wellington orders a general retreat

The French have won the battle


French have lost 4 infantry and 2 cavalry casualties (1800 men)

British have lost 6 infantry and 1 cavalry casualties (2500 men)

Spanish have lost 2 infantry and 1 cavalry casualties (900)


2 French brigades in rout

3 British brigades in rout

2 Spanish brigades in rout


Thursday, September 21, 2023

1 July 1813 – North Spain – Day 6


French retreat from Avila

French attack Talavera
Guerrilla attack Valdemoro and two convoys


1st British army regroup and resupply at Avila

2nd British army attacked at Talavera

3rd British army resupply a t Torrecilla


10th French army retreat to Villacastin

11th French army attack Talavera

12th French army regroup and resupply at San Martin


12th guerrilla attack Valdemoro, garrison lose 10% casualties

13th guerrilla capture convoy from Mostoles to Maqjueda, escort lose 10% casualties

15th guerrilla capture convoy from Valdemoro to Carranque, no casualties to escort

Thursday, September 14, 2023

30 June 1813 – Battle of Avila


Tactical map of battle area

Wellington commands 1st Anglo-Spanish army at Avila

1 infantry and 1 cavalry brigade are non operational due to casualties


Soult commands 10th French army who attack Avila

1 infantry and 1 cavalry brigade are non operational due to casualties

A second infantry brigade is the garrison of Villacastin


French – 10 infantry brigades, 2 cavalry brigade, 3 corps artillery

British –    7 infantry brigades, 1 cavalry brigade, 2 corps artillery

Spanish – 3 infantry brigades, 1 cavalry brigade, 1 corps artillery

Table at start of battle

Wellington has deployed his army in and around the walled town of Avila

1st British corps is on the left, 2nd British corps is on the right

7th Spanish corps is in the town

He has created a reserve of his two best British brigades, behind the town


Soult will arrive on the table at the start of move 1

End of move 2

Both British corps have advanced to the forward edge of the town


Soult is advancing towards the allied line

28th Young guard corps is on the right

29th French corps is in the centre

30th Polish corps is on the left

Soult has created a reserve centre left

It consists of one brigade and corps artillery from 29th and 30th corps

End of move 4

French artillery have received first casualties of the game


Left - 1st British artillery hit French gunners with first shot of the game

Centre - Wellington is leading reserve forward between 1st corps and the town

Right - 2nd British corps is still out of artillery range


Left -30th Polish corps has reached southern edge of hill

Centre - French reserve deploys, gunners pass morale with 20% casualties

Centre - 29th French corps deploy out of artillery range

Right - 28th Young guard deploy out of artillery range

End of move 6

French advance


Left - Wellington moves reserve to support 1st corps

Centre - Spanish artillery rout French cavalry

Right - 2nd corps artillery infantry and gunners rout, but rally and return


Left - 30th Polish halt on hill

Left - French reserve advance in support of Poles

Centre - 29th French cavalry charge Spanish guns, are routed with 20% casualties

Right - 28th French artillery rout British gunners, infantry and cavalry, infantry advance

End of move 8

French attack


Left - British infantry receive 10% casualties, but pass morale test.

Left – British reserve deploy behind 1st corps

Centre – Spanish cavalry rout from artillery fire, nearby gunners join them

Right – British gunners rally and return to guns


Left – Poles wait on ridge, British are too strong to attack

Left – French reserve fire on gunners and infantry

Centre – French infantry in position to attack garrison

Right – French prepare to attack

End of move 10

French take right half of Avila


Left – British reserve move towards Avila

Left – Highland brigade fail morale with 20% casualties and retreat

Centre – Right hand garrison of Avila fail morale and retreat with 20% casualties

 Right – 2nd British corps withdraws facing the French


Left – Polish infantry prepare to advance

Centre – French reserve prepare to attack left half of Avila

Centre – French infantry enter right half of Avila

Right – 28th French corps advances

End of move 12

Fighting continues at nightfall, but Wellington still holds Avila


Left – Highland brigade rally with 20% casualties

Centre – Spanish hold left half of Avila, and counter attack right half

Right – 2nd British corps withdraws to village


Left – Polish infantry remain on hill

Centre – French reserve fail to take left half of Avila

Centre – 29th corps take right half of Avila

Right – 28th corps redeploy and do not pursue withdrawing British 


Summary

Despite heavy fighting both sides have suffered minor casualties

All routed brigades, except French chasseur brigade, have rallied from rout

At nightfall the Spanish hold left half of Avila and are attacking right half

Wellington’s reserve of two British brigades are in position to support town

Soult orders a retreat, Wellington has won the battle


French have lost 4 infantry, 2 cavalry and 1 artillery casualties (1900 men)

British have lost 3 infantry and 3 artillery casualties (1300 men)

Spanish have lost 1 infantry and 1 artillery casualties (900 men)

Tuesday, September 12, 2023

30 June 1813 – North Spain – Day 5


French retreat from Torrecilla

French attack Avila

Guerrilla attack El Casar and two convoys


1st British army attacked at Avila

2nd British army regroup and resupply at Talavera

3rd British army regroup and resupply at Torrecilla


10th French army attack Avila

11th French army advance towards Talavera

12th French army retreat from Torrecilla


10th guerrilla attack El Casar, repulsed with 30% casualties

11th guerrilla attack convoy to Mostoles, repulsed with 20% casualties

15th guerrilla capture convoy to Carranque, escort suffer 10% casualties

Saturday, September 9, 2023

29 June 1813 – Battle of Torrecilla


Tactical map of battle area

General Picton commands the Third Anglo-Spanish army at Torrecilla

It consists of 5th and 6th British and 9th Spanish corps

He has lost 18 infantry and 3 cavalry casualties at San Martin


Marshal Marmont commands the Twelfth French army, tasked to take the town

He has 34th and 35th French and 36th Vistula corps

He has lost 5 infantry and 3 cavalry casualties at San Martin


French – 11 infantry brigades, 3 cavalry brigade, 3 corps artillery

British –    6 infantry brigades, 1 cavalry brigade, 2 corps artillery

Spanish – 2 infantry brigades, 1 cavalry brigade, 1 corps artillery

Table at start of battle

Picton’s army is deployed in and around Torrecilla at the start of the battle

He has created a reserve of two British infantry brigades behind the town


The French will arrive on the table at the start of move 1

End of move 2

French army arrive on table


Left – 6th British artillery move closer to town

Centre – wait for French to approach

Right – 5th British corps for French to approach


Left – 36th Vistula corps advance over hill

Centre left – Marmont has taken command of 36th and 35th corps artillery

Centre right – 35th French corps advance towards town

Right – 34th French corps advance over hill

End of move 4

French army continue to advance


Left – 6th British artillery deploy between hill and town

Centre – Spanish cavalry move to right, between town and hill

Right – 5th British corps wait for French to approach


Left – Vistula corps advance screened by high ground

Centre left – Combined artillery unlimber at extreme range

Centre – right – 35th French corps halt out of artillery range

Right – 34th French corps advance screened by high groun

End of move 6

French halt in the centre, arrive within attack range on the flanks


Left – British artillery redeploy to fire on infantry on hill

Centre – Artillery and garrison both receive artillery casualties, both pass morale test

Right – Artillery counter fire, but no casualties


Left – Vistula lancers advance to engage British cavalry

Centre – Artillery hit gunners and town, remainder half out of artillery range

Right – Infantry move onto hill, out of sight of British artillery

End of move 8

French attack town


Left – British dragoons rout Vistula lancers

Centre – Garrison receive more artillery casualties, but pass morale test

Right – British infantry withdraw on hill


Left – With the loss of their cavalry the Vistula infantry halt

Centre – French infantry advance to storm town, cavalry are shaken by artillery fire

Right – French infantry on hill prepare to attack

End of move 10

Full French attack

Extensive infantry melee in town


Left – British cavalry withdraw, infantry melee on hill

Centre – British and Spanish artillery withdrdaw

Centre -  Both Spanish brigades routed in town, also one French brigade

Right – Portguese brigade lose 20% in firefight, but pass morale test


Left – French attack hill, first round of melee is a draw

Centre – French artillery advance as enemy gunners withdraw

Centre – French take all of town, but one brigade fails morale and routs

Right – French win melee, but Portuguese refuse to retreat


End of move 12

British hold town at nightfall and win battle  


Left – British brigade rout, but remaining brigade continues musket fire

Centre – British infantry in town receive casualties but pass morale test

Right – British retreat , Portuguese infantry rout

Left – Infantry brigade rout remaining infantry continue musket fire

Centre – French artillery pound British garrison

Right – French infantry occupy British hill


Summary

At nightfall British infantry hold all of Torrecilla

Fighting on left hill is a draw

French have taken hill on the right

Anglo-Spanish have won the battle


French have lost 4 infantry and 2 cavalry casualties (1800 men)

British have lost 7 infantry and 2 artillery casualties (3000 men)

Spanish have lost 4 infantry and 1 artillery casualties (1700 men)


Anglo-Spanish have 4 brigades in rout

French have 4 brigades in rout

29 June 1813 – North Spain – Day 4


French occupy Maqueda and secure 3 days supplies

French attack Torrecilla

No guerrilla activity


1st British army regroup and resupply at Avila

2nd British army retreat to Talavera

3rd British army defend Torrecilla


10th French army advance towards Avila

11th French army occupy Maqueda

12th French army attack Torrecilla


No guerrilla attacks today

10, 11 and 15 groups are regrouping and resupplying

12, 13 and 14 groups are retreating to their safe areas